Hi!
Today's lesson continued with using outline stamps. All of the demonstrations today were awesome. My favorite was Debby Hughes' card. Seriously I love everything she does, she is so talented. Her lesson was stamping on non paper. I didn't have the material she used, so I used vellum. Is vellum considered paper? Ha maybe it is! Oh well that is what I used.
I white embossed the flower image on vellum and colored with copics and then turned it into a tag. The rest is just patterned paper and some twine. This was really easy to do and took no time at all.
Supplies Used:
Stamps: Penny Black Garden Blooms, Winnie & Walter Big Bold
Die: W9Plus tag
See ya soon!
Saturday, August 9, 2014
Friday, August 8, 2014
OCC Stretch Your Stamps 2-Day 5
Hello,
Day 5 of OCC and I am thoroughly enjoying all the different techniques for using the stamps you already have in different ways. Today's lesson focused on Outline Stamps. Most of what was demonstrated today were flower images. I really, really liked Shari Carroll's card, but didn't have a stamp close to what I could use for her card. I am going to get one because I want to try it soon. Jennifer McGuire demonstrated a technique using embossing powder and an outline flower stamp. She used different color embossing powders. I didn't have any of the colors she used. :( . BUT as she always does, she gave an alternative way to achieve the same result, using markers. Stamping the image and coloring the stamp with different color markers and them applying it to the paper and when finished, embossing.
This is what I made:
I used iridescent embossing powder but it is really hard to see, I wish it showed up better, because it makes a big difference on the card. I really like how this turned out and will use this technique again. The sentiment is embossed using Ranger Silver.
Supplies Used:
Stamps: Penny Black Garden Bloom, SSS Friendship Messages
Thanks for coming by!
Day 5 of OCC and I am thoroughly enjoying all the different techniques for using the stamps you already have in different ways. Today's lesson focused on Outline Stamps. Most of what was demonstrated today were flower images. I really, really liked Shari Carroll's card, but didn't have a stamp close to what I could use for her card. I am going to get one because I want to try it soon. Jennifer McGuire demonstrated a technique using embossing powder and an outline flower stamp. She used different color embossing powders. I didn't have any of the colors she used. :( . BUT as she always does, she gave an alternative way to achieve the same result, using markers. Stamping the image and coloring the stamp with different color markers and them applying it to the paper and when finished, embossing.
This is what I made:
I used iridescent embossing powder but it is really hard to see, I wish it showed up better, because it makes a big difference on the card. I really like how this turned out and will use this technique again. The sentiment is embossed using Ranger Silver.
Supplies Used:
Stamps: Penny Black Garden Bloom, SSS Friendship Messages
Thanks for coming by!
Thursday, August 7, 2014
OCC Stretch Your Stamps 2-Day 4
Hello!
The lesson for the Online Card Class today were more examples of how to s-t-r-e-t-c-h :) your stamps. The card created by Kelly Alvarez was so darn cute and I loved the concept. She used alphabet letters to represent rain falling on an umbrella so I set out to try to recreate it. This is what I made:
The letters represent water falling on the flower and I put the sentiment in red. All of the stamp sets used were Paper Smooches. The flower was colored with copics and mounted on foam dots. I added a white stitched border and some little enamel dots for some more color. Using an alphabet set in this way I think can be recreated many ways. I really like the way it turned out!
Since this is a card created with all Paper Smooches products I decided to enter it into the PS Sparks Challenge-Anything Goes this week. Paper Smooches Challenge August 3-9.
This would be my 2nd entry. :)
Supplies used:
Stamps: Paper Smooches Perky Plants, Green Thumb, and Alphadot
Have a great day!
The lesson for the Online Card Class today were more examples of how to s-t-r-e-t-c-h :) your stamps. The card created by Kelly Alvarez was so darn cute and I loved the concept. She used alphabet letters to represent rain falling on an umbrella so I set out to try to recreate it. This is what I made:
Since this is a card created with all Paper Smooches products I decided to enter it into the PS Sparks Challenge-Anything Goes this week. Paper Smooches Challenge August 3-9.
This would be my 2nd entry. :)
Supplies used:
Stamps: Paper Smooches Perky Plants, Green Thumb, and Alphadot
Have a great day!
Wednesday, August 6, 2014
OCC Stretch Your Stamps 2-Day 3
Hi,
Today is Day 3 of the OCC Stretch Your Stamps 2. The emphasis today was on using alphabet stamps and sentiment stamps in different ways. My card was influenced by pretty much all of the instructors today. I took a little bit of this lesson and a little bit of that one. :)
My card is a lot like what Stephanie Klauck demonstrated. She used a stencil and lettered a phrase inside with an alphabet stamp set and then distressed the inside of the stencil. I didn't have a stencil for what I wanted to do so I made one. I die cut a onsie using a little stiff packaging material, and got the effect I wanted. I added a patterned paper banner, with a sentiment embossed on vellum with black embossing powder. Then I added twine and enamel dots.
Supplies used:
Stamps: Lawn Fawn Rileys ABC's, Winnie and Walter Big & Bold stamp sets
Die Cut: Wplus9
Thanks for coming by and I am loving these classes so far!
Today is Day 3 of the OCC Stretch Your Stamps 2. The emphasis today was on using alphabet stamps and sentiment stamps in different ways. My card was influenced by pretty much all of the instructors today. I took a little bit of this lesson and a little bit of that one. :)
My card is a lot like what Stephanie Klauck demonstrated. She used a stencil and lettered a phrase inside with an alphabet stamp set and then distressed the inside of the stencil. I didn't have a stencil for what I wanted to do so I made one. I die cut a onsie using a little stiff packaging material, and got the effect I wanted. I added a patterned paper banner, with a sentiment embossed on vellum with black embossing powder. Then I added twine and enamel dots.
Supplies used:
Stamps: Lawn Fawn Rileys ABC's, Winnie and Walter Big & Bold stamp sets
Die Cut: Wplus9
Thanks for coming by and I am loving these classes so far!
Tuesday, August 5, 2014
OCC Stretch Your Stamps Days 1 & 2
Hello,
I am participating in the Online Card Class Stretch Your Stamps. The focus on days 1 & 2 has been using background stamps and how versatile they can be. Many great examples were demonstrated and I hope to try some more techniques in the future. The technique I wanted to try first was demonstrated by Laura Sterckx. She created an ombre effect on a cardfront with distress inks.
This is the card that I did:
I heat embossed a background stamp with white embossing powder and used distress inks to blend the colors on the card. I cut a banner and kinda drew a rough border with a Versamark pen and heat embossed it. I diecut the 'thanks' four times, glued them on top of one another, and used a clear embossing powder to give it a little shine. I added some sequins to 'pretty it up' a bit. :)
I liked the way this turned out, I hope you do too.
Supplies used:
Hero Arts Lattice background stamp
Distress Inks: Tim Holtz Iced Spruce, Broken China, Mustard Seed
Die Cut: Memory Box
Thanks for coming by.
I am participating in the Online Card Class Stretch Your Stamps. The focus on days 1 & 2 has been using background stamps and how versatile they can be. Many great examples were demonstrated and I hope to try some more techniques in the future. The technique I wanted to try first was demonstrated by Laura Sterckx. She created an ombre effect on a cardfront with distress inks.
This is the card that I did:
I heat embossed a background stamp with white embossing powder and used distress inks to blend the colors on the card. I cut a banner and kinda drew a rough border with a Versamark pen and heat embossed it. I diecut the 'thanks' four times, glued them on top of one another, and used a clear embossing powder to give it a little shine. I added some sequins to 'pretty it up' a bit. :)
I liked the way this turned out, I hope you do too.
Supplies used:
Hero Arts Lattice background stamp
Distress Inks: Tim Holtz Iced Spruce, Broken China, Mustard Seed
Die Cut: Memory Box
Thanks for coming by.
Monday, August 4, 2014
Paper Smooches Sparks Challenge-Week August 3-9 Anything Goes
Hello,
Hope everyone had a great Monday! This post is an entry into the Paper Smooches Sparks Challenge Week 3-9 Anything Goes.
I love PS's Chubby Chums (aren't they cute) and don't use it enough, so I decided I was going to for this card. This is what I came up:
I stamped, colored, and fussy cut the dog and cat, then mounted on foam squares to the card front (don't you love the apple green card stock!) All of the letters and numbers are from the PS Alphadot set. I used the PS Stitched Wise Dies on the bottom of the card. That's washi tape on the top for some accent (and there was a little inky smudge I had to cover up) :) The sentiment on the side looked a little bare so I added color to the centers of some of the letters. I kinda like the way it came out. :) And oh yeah, added googly eyes, can't resist googly eyes!!
Paper Smooches Sparks Challenge Week of Aug 3-9
Thanks for coming by, see ya later.
Hope everyone had a great Monday! This post is an entry into the Paper Smooches Sparks Challenge Week 3-9 Anything Goes.
I love PS's Chubby Chums (aren't they cute) and don't use it enough, so I decided I was going to for this card. This is what I came up:
I stamped, colored, and fussy cut the dog and cat, then mounted on foam squares to the card front (don't you love the apple green card stock!) All of the letters and numbers are from the PS Alphadot set. I used the PS Stitched Wise Dies on the bottom of the card. That's washi tape on the top for some accent (and there was a little inky smudge I had to cover up) :) The sentiment on the side looked a little bare so I added color to the centers of some of the letters. I kinda like the way it came out. :) And oh yeah, added googly eyes, can't resist googly eyes!!
Paper Smooches Sparks Challenge Week of Aug 3-9
Thanks for coming by, see ya later.
Saturday, August 2, 2014
CAS(E) this Sketch #87-SSS Work It Wednesday
Hi there,
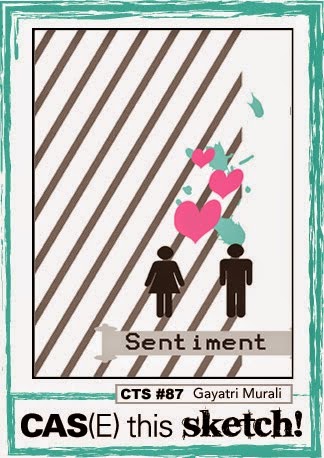
This weeks CAS(E) this Sketch challenge is inspired by this sketch:
The theme also is to incorporate a tag into your design, either a tag by itself or on a card.
This is what I came up with:
The tag is inked with distress inks and then I embossed it with a stencil. The embossing paste was tinted with the same color as the tag color. I like the look of the light and dark areas between the tag colors. The hearts are die cut as well as the 'congrats'. I just stamped the letters on the hearts, added sequins and a ribbon tie. I wish you could see this better, I tried photographing it in all types of light but I couldn't get the colors to pop they way I wanted to and the way they look naturally. :/
CAS(E) this Sketch #87
I am also entering this in the Simon Says Stamp Work It Wednesday Challenge.
Simon Says Stamp Work It Wednesday Challenge
Where Blue is the main theme.
Supplies used:
Die Cuts: Simon Says Stamp Hearts, Papertrey Ink Congrats
Stamps: Lawn Fawn Riley's ABC's
Stencil: Simon Says Stamp Waves
Embossing Paste: Wendy Vecchi
Distress ink: Tim Holtz Iced Spruce
Next week starts the Online Card Class Stretch Your Stamps that I am participating in, so I hope to be posting projects from the classes.
Thanks for coming by, see you soon.
This weeks CAS(E) this Sketch challenge is inspired by this sketch:
The theme also is to incorporate a tag into your design, either a tag by itself or on a card.
This is what I came up with:
The tag is inked with distress inks and then I embossed it with a stencil. The embossing paste was tinted with the same color as the tag color. I like the look of the light and dark areas between the tag colors. The hearts are die cut as well as the 'congrats'. I just stamped the letters on the hearts, added sequins and a ribbon tie. I wish you could see this better, I tried photographing it in all types of light but I couldn't get the colors to pop they way I wanted to and the way they look naturally. :/
CAS(E) this Sketch #87
I am also entering this in the Simon Says Stamp Work It Wednesday Challenge.
Simon Says Stamp Work It Wednesday Challenge
Where Blue is the main theme.
Supplies used:
Die Cuts: Simon Says Stamp Hearts, Papertrey Ink Congrats
Stamps: Lawn Fawn Riley's ABC's
Stencil: Simon Says Stamp Waves
Embossing Paste: Wendy Vecchi
Distress ink: Tim Holtz Iced Spruce
Next week starts the Online Card Class Stretch Your Stamps that I am participating in, so I hope to be posting projects from the classes.
Thanks for coming by, see you soon.
Subscribe to:
Posts (Atom)